Thursday, January 19, 2017

Watercolor Pencils meet Swan Lake

Today's card is not my usual A2 size card, its made on our Stampin' Up! notecards.  I used our new Stampin' Up! Watercolor Pencils, Blender pen and another new stamp set from our Occasions Catalog.  At first, this stamp set really didn't catch my eye, but now, I'm in love with this stamp set.

Meet, Swan Lake
Swan Lake Clear-Mount Stamp Set

How could one stamp set bring so much peace and tranquility to your day? We're not sure on the dynamics of that, but the calm and serene message of this stamp set is certainly as peaceful as can be.


And, I used the new Water Color Pencils

Watercolor Pencils

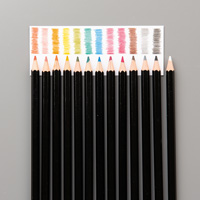
High-quality, smooth color pencils. Perfect for watercoloring stamped images. Use with Aqua Painters, Blender Pens, or alone.


* 13 pencils in Stampin’ Up! colors: Basic Black, Basic Gray, Bermuda Bay, Calypso Coral, Daffodil Delight, Early Espresso, Melon Mambo, Old Olive, Pacific Point, Pumpkin Pie, Real Red, Rich Razzleberry, Whisper White


Ok, I won't let you wait any longer, here is the note card created


I also stamped on the envelope.


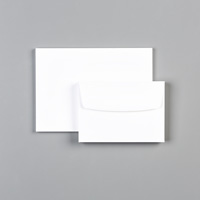
As mentioned earlier, I used our Stampin' Up! note cards, which they come in a pack of 20 Whisper White cards: 5" x 3-1/2" and 20 Whisper White envelopes: 5-1/8" x 3-5/8". 


Psst--do you want to know the easiest way to make a card? Start with Note Cards & Envelopes. They're ready for you to make and send a card. Card has thicker cardstock for layering and embellishing.

Layered on that is the Basic Black cut 1/8" smaller and the top layer that I stamped on and water colored is the Shimmery White Cardstock, cut 1/8" smaller than the Basic Black card stock.


The images from Swan Lake stamp set were stamped with Tuxedo Black Memento ink on the Shimmery White Card stock and than colored in with the new Water Color pencils and blended with the blender pens.  I have to say, this was a very relaxing, fun, card to create.


I hope you enjoyed it as much as I do.  I'm in love with this stamp set.


Supplies used:

Whisper White Note Cards & EnvelopesWhisper White Note Cards & Envelopes.  Item#131527, $6.00


Shimmery White 8-1/2" x 11" CardstockShimmery White 8-1/2" X 11" Cardstock.  Item#101910, $8.00


Swan Lake Clear-Mount Stamp SetSwan Lake Clear-Mount Stamp Set.  Item#142977, $20.00

                                                Swan Lake Wood-Mount Stamp Set.  Item#142974, $28.00


Watercolor PencilsWatercolor Pencils.  Item#141709, $16.00


Blender PensBlender Pens.  Item#102845, $10.00


Tuxedo Black Memento Ink PadTuxedo Black Memento Ink Pad.  Item#132708, $6.00


SNAIL AdhesiveSnail Adhesive.  Item#104332, $7.00


Stampin' TrimmerStampin' Trimmer.  Item#126889, $30.00


Thank you for visiting my blog today and I hope you enjoyed this creation.


Happy Stamping!

Wednesday, January 11, 2017

Nailed It + Build It = Create It!

Bundle & Save 10%!

Playing with new stamp sets and supplies when a new catalog is introduced is what I love to do as a Stampin' Up! Independent Demonstrator.

Today I will be sharing with you my card I created using a bundle that is in the new Occasions Catalog.  Purchase the bundle and save 10%.
Nailed It Clear-Mount Bundle

Stamp set - Nailed It; its available in clear mount or wood mount
Framelits Dies - Build It


Doesn't this look like a fun card for that man in your life?

How to re-create this card
These 4 steps are your constant measurements for any A2 size card.

1 - Cut a 8 1/2" x 11" piece of Crumb Cake cardstock in half.  End result, 8 1/2" x 5 1/2".
2 - On the 8 1/2" side, score at 4 1/4".  End result, 4 1/4" before the score mark and after the score mark and 5 1/2" in height.
3 - Cut a piece of Basic Black cardstock at 4" x 5 1/4".  This is your first layer on top of your base, which will give you a border
4 - Cut a piece of Smokey Slate at 3 3/4" x 5".  This is your top layer and gives you the same equal distance border.

  • using the Sparkle embossing folder, emboss this Smokey Slate cardstock or substitute with the Hexagons Dynamic Textured Impressions Embossing Folder (new in the Occasions Catalog)
5 - The Crumb Cake cardstock is light (color) enough for the inside, but if you want to line the inside of your card, cut a piece of cardstock at 4" x 5 1/4", same size as #3 above.

Now with all that done, using scrap pieces of cardstock, we will be stamping.  To create this card, all the stamping is from this one stamp set, Nailed It!.

1 - Using Smokey Slate cardstock, you will be stamping the screws, washers, wrench, hammer, screwdriver with Memento Tuxedo Black ink and cutting them out using the coordinating framelits dies.
2 - Using Daffodil Delight cardstock, you will be stamping the screwdriver head again with Memento Tuxedo Black ink and using the coordinating framelits dies to cut out the design.
3 - Using Crumb Cake cardstock, you will be stamping the hammer handle and sentiment with Memento Tuxedo Black ink and once again using the coordinating framelits dies to cut out the design.

  • Once everything has been stamped and cut, you will be adhering the pieces together.  And, dont forget, if you want some extra tools to decorate the inside of your card, you will need to stamp and cut out additionals.
After the stamping has been completed, you will now assemble your card using adhesives.  If you want some lift on your sentiment and/or your tools and supplies, use the Stampin' Dimensionals.

Hope you find these instructions helpful.

Please comment below if you would like to see more of these types of instructions on my blog.  Or, if you prefer more pictures or would prefer a Youtube video.

See the supplies needed below and when shopping, please use hostess code: MCBA2SQG
*if your order is more than $150.00, please do not use the hostess code.  Keep the Stampin' Rewards for yourself to enjoy more free products. 


Supplies used to create this masculine card.

Stamp Set & coordinating Framelits Dies

Bundle and Save!


Nailed It Clear-Mount Bundle

Bundle: (save 10%)
     Clear mount set:#144735, $43.00
     Wood mount set #144734, $50.25
Individual:
     Nail It, clear mount stamp, item#143077, $21.00
     Nail It, wood mount stamp, item#143074
     Build It Framelits Dies, item#143230, $27.00


Cardstocks:

Crumb Cake 8-1/2 x 11 Cardstock
Crumb Cake 8-1/2" X 11" Cardstock

Item#  120953
Price: $8.00

* 24 sheets
* 8-1/2" x 11"
* Crumb Cake
* Acid free
* Lignin free
Basic Black 8-1/2 x 11 Cardstock
Basic Black 8-1/2" X 11" Cardstock

Item#  121045
Price: $8.00


Smoky Slate 8-1/2 x 11 Cardstock
Smoky Slate 8-1/2" X 11" Cardstock


Item#  131202
Price: $8.00


Daffodil Delight 8-1/2 x 11 Cardstock
Daffodil Delight 8-1/2" X 11" Cardstock

Item#  119683
Price: $8.00


Embossing Folder

Sparkle Textured Impressions Embossing Folder

Item#  141468
Price: $7.50

It’s easy to make a great impression! Just place flat cardstock in this embossing folder, run it through the Big Shot, and out comes cardstock with a bold textured design. Textured Impressions Embossing Folders make deep, crisp impressions—great for card fronts and accents.

* 1 folder
* 4-1/2" x 6-3/16" (11.4 x 15.7 cm)
* Use with Big Shot

or use the Hexagons Dynamic Textured Impressions Embossing Folder in the new Occasions Catalog, p.  47

Hexagons Dynamic Textured Impressions Embossing Folder


Item#  143231
Price: $9.00

It’s easy to make a great impression! Just place flat cardstock in this embossing folder, run it through the Big Shot, and out comes cardstock with a bold textured design. Dynamic Textured Impressions Embossing Folders make extra deep, super crisp impressions—great for card fronts and accents.

* 1 folder
* 4-1/2" x 6-3/16" (11.4 x 15.7 cm)
* Use with Big Shot

Ink:

Tuxedo Black Memento Ink Pad


Item#  132708
Price: $6.00

No craft stash is complete without the essential black ink pad. You'll love the coverage this ink gives.

* Tuxedo Black
* Acid free
* Refills available

SHOP NOW!

Click on the "Shop Now" link and be taken directly to my Online Store


Remember, Sale-A-Bration is ON!
Shop from our Annual Catalog, Occasions Catalog and Clearance Rack to earn FREE products from the Sale-A-Bration Catalog.


Annual Catalog 2016-2017


Occasions Catalog 2017
Sale-A-Bration 2017- FREE Products to choose from!


*for every $50.00 you purchase, pick one FREE product from the Sale-A-Bration Catalog, FREE!  Who doesn't love FREE?

Any questions, please contact me!

Happy Crafting!

Monday, September 21, 2015

Tips and Tricks for the Precision Base Plate


Some tips & tricks for the Precision Base Plate is shared in this short video.  Also, a brief description about framelits and thinlits.

Happy Crafting!

Precision Base Plate by Stampin’ Up!

The new Precision Base Plate for the Big Shot can be found in the Holiday Catalog on p. 14

This steel plate will deliver improved performance with your detailed dies.  It will give you extra fine cuts for the more intricate and very detailed dies like the Delicate Ornament Thinlits Dies on p. 15.


Contact me today to order your Precision Base Plate or find it in my Online Store at:  www.lorenetanigawa.stampinup.net

Happy Crafting!

Thursday, January 30, 2014

Repost on the New Firm Foam Pads (Stampin' Up!)

Wednesday, January 29, 2014

Reposting about Stampin' Up!

New Firm Foam Pads FAQs

(click on picture below and it will take you directly to the Ink pads page) Ink Pads

Updated July 5, 2012
Q: Why did we switch from felt pads to firm foam pads?
A: We have worked very hard to improve the functionality of our Classic Stampin’ Pads. The firm foam allows for better ink coverage; plus it stays juicer and lasts longer.
Q: Do old Classic Stampin’ Ink Refills work with the new firm foam pads?
A: Yes, with the exception of Basic Black, Basic Gray, Marina Mist, Perfect Plum, and Tempting Turquoise, which have been reformulated to work with the new foam pad material. We do not recommend using old ink refills in these colors with the new firm foam pads.

Q: Before I use my firm foam pad, do I need to tap it and massage the ink around?
A:  No. The firm foam pads are ready for use immediately. The best stamping technique with the firm foam pad is light tapping.
Q: My pad is too wet. What should I do?
A: The closer to the manufacture date, the juicer the pad will be. As the pad ages, this problem will fade. In the meantime, very light tapping will reduce the extra ink on the stamp. You can also use a paper towel to blot the area of the stamp pad that you will be using.
Q: The firm foam on my lighter color pads looks blotchy. Is this normal?
A: Yes. The blotchiness is caused by the characteristics of the pad material. It does not affect the stamped image.
Q: When I first stamp with certain colors, my images seem a lot darker. Why is this happening?
A: When stamping with your old pads, you had to work hard to get even ink coverage on your stamp. With the new firm foam pad, the stamp gets a lot more ink on it so when you stamp, your image will appear darker.  Once your stamped image dries, the color will look normal.
Q: When I compare the firm foam pads to my felt pads, some of the colors don’t seem to match. Why is this?
A: The firm foam and felt will not match exactly. Ink reacts differently to different materials. We have quality checked each ink color to ensure that the stamped ink color is true.
Q: How long will the pad last before I need to re-ink it?
A: The amount you use it will affect how often you need to re-ink. Please keep in mind that these pads release a lot more ink onto your stamp, resulting in a crisp, solid image. Since the pads release more ink, they will need to be refilled more often.
Q: What is the best way to remove the color labels from the bottom of the ink pad?
A: Start at the right bottom corner (just above the barcode) and slowly peel the corner up by removing both layers.
Q: Which end of the case do you apply the label to?
A: The label goes on the end where you open the case.
Q: If the ink pad becomes saturated with ink or liquid, will it cause the label to fall off?
A: No, the label should not be affected. However, like most labels, if you pick at it or try and remove it, it may start to peel up.
Q: What are some additional features of the new firm foam pads that I can share with my customers?
A: See additional features below:
  • The firm foam is nice and flat and will not become wavy.
  • The firm foam material does not imprint on the stamp images like the felt pad sometimes did. However, because the firm foam material is a foam base material, the stamp image can momentarily leave an imprint on the pad, which can transfer to a second stamped image. By inking your stamp on different areas of the pad or waiting momentarily for the ink to rise back to the top, you can easily avoid this situation.
  • The firm foam material is soft and has a nice bounce to it. It’s not hard like the felt is.
  • The ink lay-down (how the ink is absorbed into the card stock) is even, not blotchy, and dries quickly. It has an increased opacity and stamps solid images beautifully.
  • Please note: We do not recommend using the Basic Black Classic Stampin' Pad on Whisper White or Very Vanilla Card Stock. Instead, we recommend you use the StazOn Ink Pad.
Q: Will Stampin’ Spots use the new firm foam pad?
A: No. Stampin’ Spots will remain the same.
Q: Can I use the reformulated ink with my Stampin’ Spots?
A: Yes.
Q: Can I use the reformulated ink with my Stampin’ Around Wheels?
A: Yes.

Hope you found this helpful!